O Sino Dos Ventos É Composto
Conheça a Composição do Sino dos Ventos e Aprenda a Fazer o Seu
Você já deve ter visto um sino dos ventos em algum lugar, seja em uma casa de campo, na varanda de um amigo ou até mesmo em um jardim público. Esses objetos decorativos não só Adding a touch of rustic charm to any space, but they also produce a soothing sound when the wind blows through them. If you've ever wondered how these wind chimes are made and what materials they're composed of, you're in the right place. In this tutorial, we'll guide you through the process of understanding the composition of wind chimes and creating your own.
Entendendo a Composição do Sino dos Ventos
Before we dive into the step-by-step guide on how to make your own wind chimes, let's first discuss the basic components that make up a typical wind chime. Generally, wind chimes are composed of the following elements:
- Supports: These are the structures that hold the chimes together, such as strings, rods, or chains.
- Chimes: These are the tubes, rods, or pieces of glass that produce the sound when they collide with each other.
- Clapper: This is the part that strikes the chimes to produce the sound. In some wind chimes, the clapper is replaced by the wind itself, causing the chimes to collide and produce sound.
- Windcatcher: This is an optional element that catches the wind and causes the chimes to move more easily. It is usually a decorative piece that adds to the visual appeal of the wind chime.
Ferramentas e Materiais Necessários
Before you start making your wind chime, ensure you have the following tools and materials:- Chimes: You can use metal tubes, glass tubes, or even pieces of driftwood.
- Supports: Strings, rods, or chains to hold the chimes together.
- Clapper: A small piece of wood, metal, or stone to strike the chimes.
- Windcatcher: An optional decorative piece to catch the wind.
- Scissors or wire cutters: To cut the strings or wires.
- Tape measure: To measure the length of the chimes and supports.
- Ruler: To measure the length of the clapper.
Passo a Passo: Criando o Seu Sino dos Ventos
Etapa 1: Medir e Cortar os Chimes
Start by measuring and cutting your chimes to the desired length. The length of the chimes will determine the pitch of the sound they produce. Longer chimes produce lower pitches, while shorter chimes produce higher pitches. Once you've cut the chimes to the desired length, set them aside.

Etapa 2: Preparar os Supports
Next, measure and cut your supports to the desired length. The supports should be long enough to allow the chimes to hang freely and collide with each other when the wind blows. Once you've cut the supports, tie a knot at one end to prevent the chimes from slipping off.
Etapa 3: Montar os Chimes
Now it's time to assemble your wind chime. Start by threading the longest chime through the support. Then, add the remaining chimes, alternating between long and short ones to create a pleasant sound when they collide. Once you've added all the chimes, tie a knot at the bottom to secure them in place.
Etapa 4: Adicionar o Clapper
Measure and cut the clapper to the desired length. The clapper should be long enough to strike the chimes but not so long that it causes them to break. Tie the clapper to the bottom of the wind chime using a separate piece of string or wire.
Etapa 5: Adicionar o Windcatcher (Opcional)
If you'd like to add a windcatcher to your wind chime, measure and cut it to the desired size. Then, tie it to the top of the wind chime using a separate piece of string or wire.
Erros Comuns na Criação de Sinos dos Ventos
- Chimes muito pesados: Chimes that are too heavy can cause the wind chime to break or become unbalanced.
- Chimes muito longos: Chimes that are too long can produce a sound that is too low and may not be pleasant to listen to.
- Chimes desiguais: Using chimes of different materials or lengths can result in a sound that is not harmonious.
Perguntas Frequentes
Qual é a Melhor Altura para Pendurar um Sino dos Ventos?
A altura ideal para pendurar um sino dos ventos depende do tamanho do sino e do local onde ele será instalado. Geralmente, uma altura de 5 a 6 pés é adequada para a maioria dos sinos dos ventos.
Como Cuidar do Meu Sino dos Ventos?
Para cuidar do seu sino dos ventos, limpe-o regularmente com uma solução de água e sabão para remover a poeira e a sujeira. Em seguida, seque-o cuidadosamente com uma toalha macia. Se o sino for feito de metal, aplique um produto para proteção contra ferrugem para mantê-lo em boas condições.

Posso Usar Qualquer Tipo de Materiais para Fazer um Sino dos Ventos?
Sim, você pode usar uma variedade de materiais para fazer um sino dos ventos, desde que eles produzam um som agradável quando colidem um com o outro. Materiais populares incluem metal, vidro, madeira e conchas.
Qual é a Duração de Vida de um Sino dos Ventos?
A duração de vida de um sino dos ventos depende do material usado na sua construção e da qualidade da sua construção. Em geral, os sinos dos ventos feitos de metal e vidro duram mais do que os feitos de madeira ou conchas. Com o cuidado adequado, um sino dos ventos pode durar vários anos.
Conclusão
A criação de um sino dos ventos pode ser uma atividade divertida e gratificante. Com os materiais e ferramentas certos, você pode criar um sino dos ventos personalizado que adicionará um toque de beleza e tranquilidade ao seu espaço. Lembre-se de seguir as etapas cuidadosamente e evitar erros comuns para criar um sino dos ventos que durará por muitos anos.

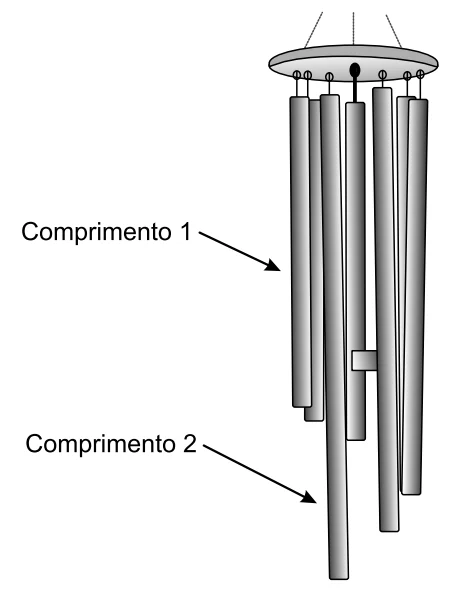
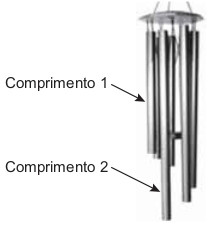
ENEM 2021 - O sino dos ventos é composto por várias barras metálicas de mesmo material e espessura,
(ENEM 2021) O sino dos ventos é composto por várias barras metálicas de mesmo material e espessura, mas de comprimentos ...
